


Today is my birthday! So now I'm 24. And engaged, since the boyfriend proposed to me this morning over presents (and should probably be promoted to 'the fiancé' now). I may just be terribly chuffed.
Anyway, I've usually made my own birthday cake since I was about...9...10, after my first brother was born at the very least (on my eighth birthday, I was not happy). I was never a fan of store bought cakes, especially as I didn't really like buttercream at the time. So I figured I would start making my own so I could have it any way I wanted! Usually it was a pretty simple sponge made of fairy cake batter with jam in and rolled out fondant on top, decorated with something to do with whatever I was into at the time. Admittedly my first cake was a domed ladybird covered in chocolate. Very nice although the middle didn't cook properly...But I was 9/10. I thought I did quite well in spite of everything.
My point is, I do this every year. It's just this year I divulged from the norm slightly by not doing my usual cake. Last year was an experiment with a new sponge recipe but was still a vanilla sponge. It was the origin of the chocolate orange buttercream though. This year I stumbled across this cake on Preheat the Oven, the blog of 2011 Great British Bake Off contestant Jason, back at the end of July and knew it was what I wanted for my birthday cake.
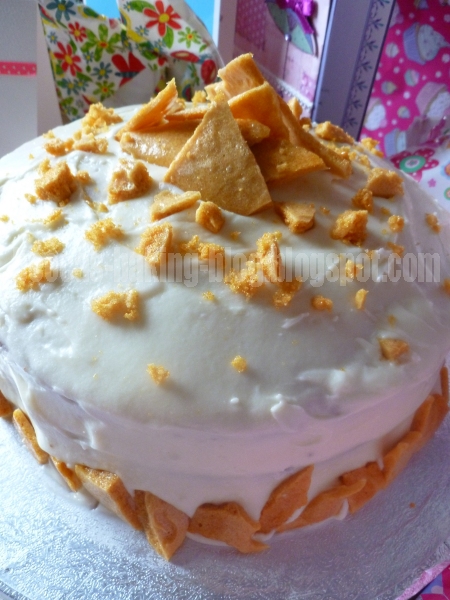
It was a bit more of a challenge than I thought. The honeycomb gave me the most trouble and took me three attempts before I could melt all the sugar without some of it burning and ruining the whole thing. My poor fiancé is now trying to clean up the mess I made of the saucepans as he clears up my kitchen (being the birthday girl has some perks). I've also never covered a whole cake in buttercream before, so that was interesting. I've by no means done a perfect job. Far from it in fact. But I'm still rather pleased.
The only other thing I can say about the cake that disappointed me was that it was a bit flatter than expected. But that's my own fault. I was very silly when reading through the recipe to see if I had all the ingredients and forgot to check the size of tin. It was supposed to be a 6 inch tin, which I did not have and could not find when I was in Kirkcaldy. I was kicking myself for not buying the ones I saw in Sainsbury's last week. That's what I get for behaving myself. So mine is made in 7 inch tins instead, because that's the smallest I could find.
Taste wise it is quite lovely. You can taste the honey in the cake but it's not too strong, which is great if you're not much of a honey lover, like myself. The buttercream is quite sweet but not ridiculously so and the honeycomb is lovely, crunchy and sweet.

Recipe - adapted from Preheat the Oven

For the cakes:
For the cakes:
- 150g/5.3oz unsalted butter
- 180g/6.3oz light brown sugar
- 3 medium eggs
- 150g/5.3oz self-raising flour
- 75g/2.6oz plain flour
- 75ml/2.6fl.oz milk
- 6 tbsp honey
- 100g/3.5oz caster sugar
- 1 tbsp golden syrup
- 1/2 tsp bicarbonate of soda
- 480g/17oz icing sugar
- 120g/4.2oz unsalted butter
- 60ml/2fl.oz milk at room temperature
- 1 tsp vanilla extract
- Preheat the oven to 180C/350F/Gas Mark 4. Grease and line a 15cm/6inch cake tin (you can use a 17.5cm/7inch pan like I did but you get a shorter, wider cake obviously).
- Start by making the cakes. You make the batter for each cake individually, using 1/3 of the ingredients for each.
- Beat together 60g/2.1oz of sugar and 50g/1.8oz butter until pale and creamy.
- Add one egg and beat in.
- Combine 50g/1.8oz self-raising flour and 25g/0.6oz plain flour together in a bowl. Add half to the cake batter and mix in.
- Add 25ml/0.6fl.oz milk and 2 tbsp of honey to the batter and mix in.
- Add the rest of the flour and beat in until smooth.
- Transfer batter to the cake tin, smoothing with a rubber spatula.
- Bake for about 20-25 minutes, or until a skewer inserted into the centre of the cake comes out clean.
- Cool in the tin for 10 minutes before transferring to a wire rack.
- Repeat steps 3-10 until you have a total of three cakes.
- To make the honeycomb, first prepare a baking sheet with greaseproof paper.
- Put the sugar and golden syrup into a saucepan and place over a medium heat. I recommend using a fairly large saucepan that distributes heat evenly and place it on the biggest ring on your hob. That way most of the sugar should dissolve at the same rate.
- You want the sugar to melt and the mixture to be the colour of honey. Do not stir. Just be patient.
- When the mixture is the right colour, quickly add the bicarbonate of soda and whisk it in, then pour immediately onto the prepared baking sheet.
- Leave to one side to set.
- To make the buttercream, mix half the icing sugar together with the butter, vanilla extract and milk until smooth and creamy.
- Add the rest of the icing sugar a tablespoon at a time, mixing after each addition. The result should be thick and creamy.
- Transfer 1/3 of the buttercream to a different bowl.
- Crush 30g/1oz of the honeycomb and mix it in to the smaller amount of buttercream.
- Place the first layer of cake on a cake board or serving plate and cover the top with half the honeycombed buttercream.
- Place the second layer on top, cover with the second half of the honeycombed buttercream, then top with the final layer. Press down gently to squish them together a bit more.
- Cover the top and sides of the cake in a fairly thin layer of buttercream to create a crumb coat. This is basically to prevent crumbs showing through.
- Coat the top and sides with a thicker layer of buttercream, smoothing over as you go.
- Break off about 6 large-ish shards of honeycomb and place on top. Break the remaining honeycomb into small piece and place around the base of the cake. If there's still a bit left over after that, crush it and sprinkle it on top.
No comments:
Post a Comment